NL
NL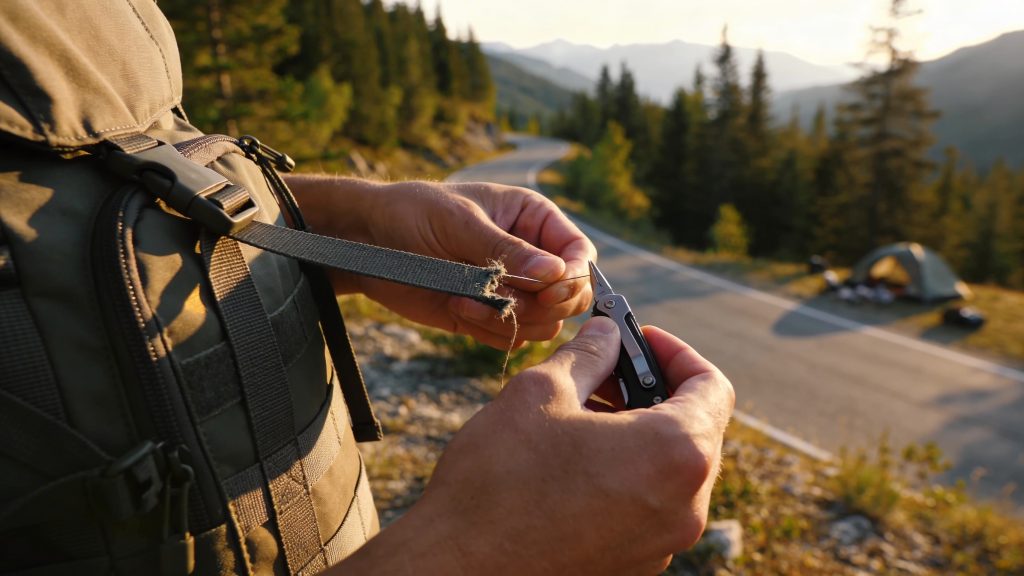
A compact toolkit and basic knowledge of minor repairs will keep you mobile during your motorhome holiday. Often it’s simple actions that get you back on the road straight away. This makes you less dependent on a local workshop. Read on to discover which tools you really need and how to fix the most common problems yourself.
Which tools to take on a motorhome road trip
A well thought-out toolkit does not need to take up much space or weight. You’ll be able to tackle the most common jobs, such as tightening loose screws, sealing small leaks or replacing a fuse. Moving parts work loose. Electrical faults occur. Seals fail. Build your kit around these problems.
Take the following basic items with you:
- A hammer for light tapping work, such as securing panels
- Screwdrivers, both Phillips and flat head, for hatches and fixings
- A spirit level and tape measure to check the vehicle and measure dimensions
- A multitool or combination pliers for cutting and gripping in tight spaces
- Insulation tape and duct tape for quick sealing jobs
- Hemp and silicone sealant for leaking windows or taps
- A tyre repair kit and spoke wrench for bicycles or small tyres
- An electrical tester and spare fuses for the motorhome’s electrical system
Store your tools in a watertight box under a bench or in the luggage compartment so they are within easy reach. Make sure you test everything before you leave, preferably during a short day trip. That way you know your kit is complete.
‘ Always switch off the power before doing any electrical work. ’
Carrying out minor motorhome repairs yourself while travelling
With some basic knowledge and the right tools you can solve many problems on the spot. Act immediately to prevent more serious damage. Always switch off the power before doing any electrical work. For example, replace a switch or check connections. If needed, take a photo of the wires before you unscrew anything.
A good time to refresh your knowledge is before you leave. Watch short instructional videos on your phone. Download a digital manual. This will help if you get stuck on the road. For more extensive checks and maintenance before departure, read our comprehensive guide on motorhome check and maintenance.
Leaking tap or shower
Wrap hemp around the tap nut and coat it with silicone paste. Tighten the nut firmly. Use tape as an emergency seal until you reach a DIY shop for a permanent solution.
Loose hinges or cupboard doors
Tighten the screws with a screwdriver. If the holes have become too wide, use wood filler to give the screws grip again. Let the filler dry and then drill a new pilot hole for the screw.
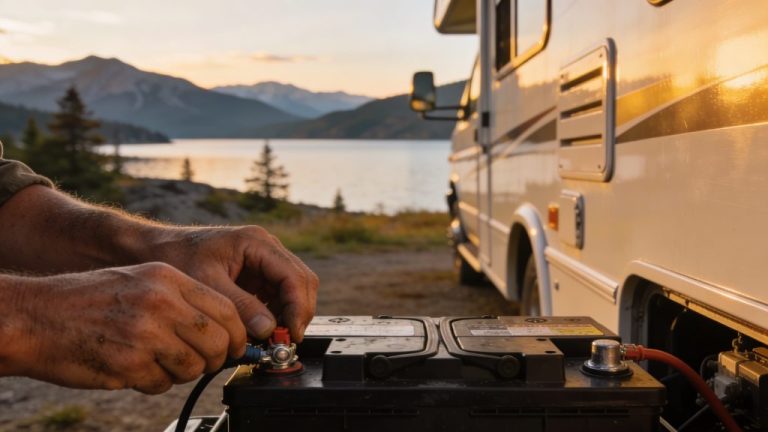
Electrical faults
Test the voltage with a multimeter. Check that the fuses are in good condition and replace them from your spares if necessary. Also check whether any bulbs have blown and replace them straight away.
Cracks in awning fabric or windows
Clean the surface thoroughly, then dry it well. Apply flexible silicone or use strong tape as a temporary fix. This will work well enough to allow you to continue your trip. A permanent repair will be needed later.
Bicycle or scooter repairs
Use a spoke wrench to true wheels. Patch a tyre with repair strips from your kit. Keep a small bike pump or CO2 cartridges handy so you can quickly get going again.
Spare parts checklist for your motorhome holiday
Besides tools there are a few spare parts that are needed regularly. These items take up very little space. They save you a lot of time and stress, especially if you break down on the way. Tailor your checklist to the type of motorhome you have and the route you plan to take.
- Spare fuses in different amperages for the electrical system
- Spare LED lighting for indoors and outdoors
- Extra screws, nuts and bolts in commonly used sizes
- Duct tape and insulation tape for various emergency repairs
- Silicone sealant and hemp for sealing
- Tyre repair strips or a complete repair kit
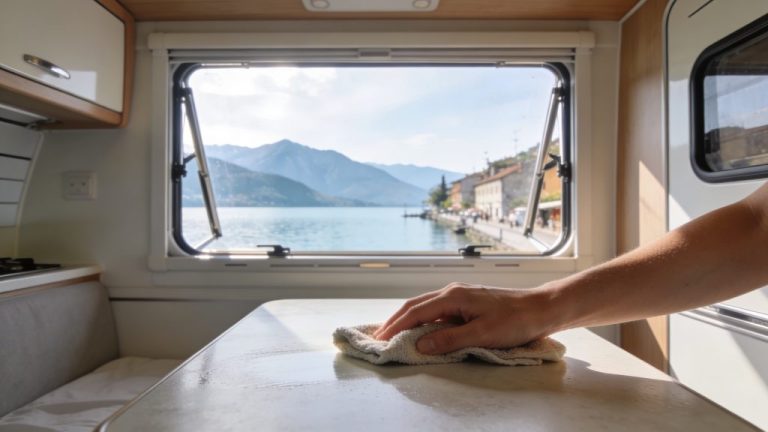
- Microfibre cloths for cleaning and protection
- A broom or small hand brush for cleaning inside and around the motorhome
Before you leave, check that all parts are complete. Test your repair materials once at home so you know how they work. In Scandinavia, take extra insulation material with you against the cold. In southern Europe, anti-rust spray is useful against salty air.
Preparing to leave and weekly checks on the road
Good preparation starts at home. The day before departure, check all screws, locks and seals. Lubricate moving parts such as hinges and catches. This helps prevent anything working loose or seizing up during your trip.
Carry out a brief inspection every week while travelling. Check that the motorhome is still level, measure tyre pressure and check the battery. Also regularly test for gas leaks. Apply a soapy solution to the connections – bubbles indicate a leak.
Abroad you will find DIY stores or so-called repair cafés in many countries where you can get free advice and help. In Germany, France and other European countries these are easy to reach. Before you leave, you could make a note of addresses along your route.
‘ Test your repair materials at home before you leave. ’
Set off well prepared
Start putting together your toolkit today. Check that you have all the basic items and spare parts. Test your repair materials at home before you leave. That way you can be sure you are prepared for minor problems on the road. Also take a look at our guide on motorhome check and maintenance for complete preparation.
Frequently asked questions
A compact multitool (multifunctional pocket knife) is essential for minor repairs during a road trip or train journey. You can use it to tighten screws, cut, saw and fasten or loosen small parts. It replaces several separate tools in one light and handy device.
Take a small sewing kit with you containing needles, strong thread, spare buttons and a few safety pins so you can carry out emergency repairs straight away. Before departure, check all the zips and buttons on the clothes and luggage you use most often, and repair or replace anything that is already weak. Where possible, choose clothing and bags with sturdy zips and extra buttons so they are less likely to break. Keep your sewing kit in a fixed, easily accessible place in your luggage.
Always take a small tool kit with you containing, among other things, screwdrivers, a multitool/pliers, duct tape, insulation tape and a tyre repair kit for both car and bicycle. Make sure you have a compact electrical kit with spare fuses, a simple voltage tester and an extra (bike) light. Store all of this together and within easy reach in your vehicle so you don’t have to search or go to an expensive workshop for minor defects. Beforehand, use short online videos to learn how to patch a tyre, replace a fuse and tighten a loose screw or hinge.
The most common minor emergency repairs are tightening or adjusting loose hinges, cupboard doors and panels, and quickly sealing small leaks at taps, windows or seams with tape or sealant. It also often involves replacing blown fuses and bulbs in the electrical system. Emergency repairs to (bicycle) tyres and adjusting spoked wheels are also common. Finally, temporary repairs to tears in awning fabric or plastic windows with tape or sealant are typical jobs that smart travellers do themselves.