NL
NL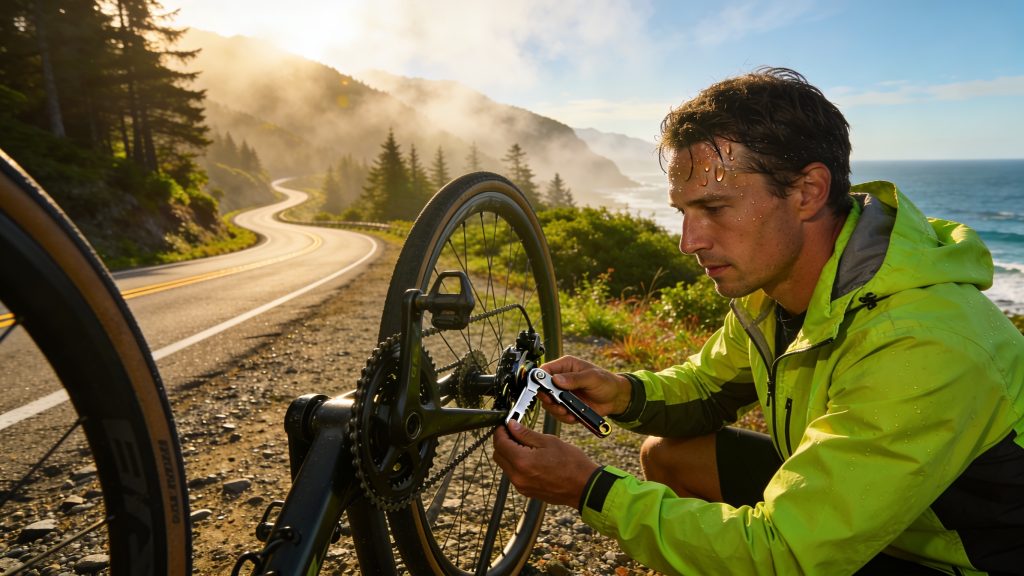
A cycling holiday stands or falls with well-prepared equipment and a basic knowledge of repairs. Being able to act quickly when small problems arise on the way prevents a lot of frustration and time loss. With the right tools, daily checks and a few essential skills, you can solve almost any problem yourself or fix it temporarily until you find help. Are you planning to go on a cycling holiday through nature-rich areas? Then it is even more important to set off well prepared.
The most common problems during a cycling holiday
During multi-day cycling holidays, four problems occur most often:
- Flat tyre – caused by sharp objects on the road, worn outer tyres or too low tyre pressure.
- Chain problems – a chain that comes off, dries out or even breaks due to poor adjustment, dirt or too little lubrication.
- Brake problems – due to worn brake pads, dirt on rims or discs and incorrect adjustment.
- Gear problems – due to a poorly adjusted derailleur or dirt.
Extra load from luggage, changing weather conditions and long distances increase the risk of wear. Small problems quickly become bigger on the road if you do not tackle them in time. A loose chain or soft tyre disrupts the trip and even becomes unsafe in certain situations.
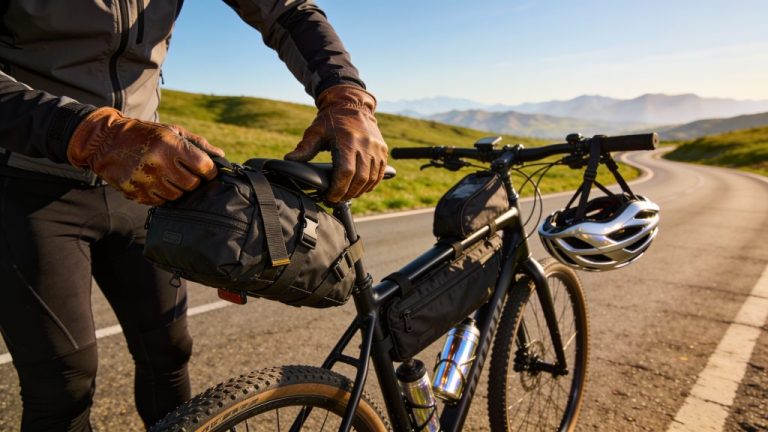
Tools to take with you
A compact and purpose-built repair kit is much more effective than a heavy toolbox. Take the following items with you:
- Tyre levers to easily remove the outer tyre from the rim
- Mini pump or CO2 pump for inflating tyres
- Spare inner tube that fits your bike
- Patches or a repair kit in case you get multiple punctures
- Multi-tool with Allen keys and screwdrivers
- Chain tool or quick link for chain repairs on long rides
- Small bottle of chain oil to keep the chain running smoothly
- Pair of gloves or a cloth to keep your hands clean
- Pieces of tape or cable ties for emergency repairs
- Spare brake pads for long distances or wet weather
Besides tools, it is useful to have a note with your bike model and frame size with you. Also keep phone numbers of local bike shops or breakdown services. If you are cycling abroad, write down basic words in the local language for terms such as tyre pump, chain, brake and spare part.
Replacing a flat tyre
Replacing an inner tube is the most important skill you need to master. Practise this at least once at home before you leave, so you do not have to improvise under time pressure.
Follow these steps:
- Remove the wheel from the bike
- Partially remove the outer tyre from the rim using tyre levers
- Take out the inner tube and check where the puncture is
- Check the inside of the outer tyre for sharp objects
- Put the new or patched inner tube back into the outer tyre
- Fit the tyre back neatly on the rim without pinching the inner tube
- Inflate the tyre to the correct pressure and check that everything is seated properly
After repairing, always check the outer tyre from the inside. If a sharp stone or splinter of glass remains, you will get another puncture within a few kilometres. This is a common mistake that can easily be avoided.
Solving chain problems
You can usually put a chain that has come off the sprocket back on yourself. Turn the pedal backwards slowly while you guide the chain back onto the sprocket. Keep your fingers away from moving parts. Then check whether the derailleur is crooked or damaged.
A broken chain is trickier. You need a chain tool or quick link to remove the broken links and reconnect the chain. If you have never done this before, it is wise to seek help from a bike shop if your chain breaks.
You can prevent a dirty or dry chain with regular maintenance. Lightly lubricate the chain after rain, mud or sandy conditions. Do not use too much oil, as excess oil attracts more dirt. A clean and lubricated chain shifts better and wears less quickly.
‘ You can usually solve small problems yourself. ’
Getting help from a bike shop
For certain problems, it is sensible not to tinker yourself. Seek help if the rim is bent, the derailleur or hanger is bent, the brake disc is rubbing heavily or the chain is broken and you cannot make a connection yourself. Professional help is often needed for e-bikes with electrical faults or display messages.
You can usually solve small problems yourself. Think of a flat tyre, a chain that has come off, a loose bolt, light brake adjustment or loose lighting. For these repairs, a good multi-tool and some basic knowledge are usually enough.
Carrying out daily checks
A short daily check saves a lot of hassle. Every morning, check the tyre pressure, test the brakes and see whether the chain looks all right. Also quickly check whether bolts, bags and luggage racks are firmly secured. This only takes a few minutes.
Every few days, more extensive maintenance is wise. Clean the chain and lightly lubricate it if necessary. Check bolts, mudguards and the luggage rack for loose parts. Look at the wear on tyres and brake pads, especially if you are cycling in hilly areas.
After rain, mud or contact with salt, extra maintenance is important. Wipe the bike clean, re-lubricate the chain and check the brakes and drivetrain. Remove dirt from the links and sprockets, otherwise they can wear out or stick more quickly.
Specific points of attention for e-bikes
With electric bikes, breakdowns are sometimes harder to fix yourself. Pay extra attention to the battery level and plan charging options along the way. Regularly check that the battery is properly locked in place. Error messages on the display may indicate problems with sensors or wiring. Because an e-bike is heavier, a flat tyre or wheel problem is harder to solve on the spot. Make sure you know where you can go for e-bike-specific help along your route.
Working safely during repairs
Safety during repairs is far from a luxury. Park the bike in a stable position and do not work on a busy verge or in a dangerous spot along the road. Use gloves when working on the chain and brakes to protect your hands. After long descents, let the bike cool down a little before checking the brakes.
After every repair, take a short test ride before you continue. Check that the gears shift, the brakes work properly and the wheels spin smoothly. This extra check prevents dangerous situations further along the route.
‘ In rural areas it can make a big difference if you know where the nearest bike shop is. ’
Preparing at home before departure
Before you leave, a thorough check is a good idea. Check whether the tyres are still in good condition and not worn or cracked. Take enough spare inner tubes with you, depending on the length of your trip. Make sure the pump and multi-tool are packed and that you know how to use them.
Clean the chain and lubricate it. Test the brakes thoroughly and check the brake pads for wear. Test the derailleur and gears with loaded panniers, as a bike behaves differently under weight. Secure your luggage firmly and check that everything is strapped down.
Save a route with repair points along the way. In rural areas it can make a big difference if you know where the nearest bike shop is. Also note down basic words for breakdown in the local language if you are cycling abroad.

Tips from experienced cycle tourers
In practice, certain things keep coming back. Test your bike with full luggage before you leave. A bike that rides well when unloaded can feel and shift very differently under weight. Do not take too many tools with you, but do take the right ones. A good multi-tool and spare inner tube are more useful than a heavy toolbox.
Learn how to carry out emergency repairs. A temporary fix may be enough to reach a town or village where you can get professional help. Check tyre pressure more often than you think; especially in hot weather or with heavy luggage you lose pressure without noticing. Keep the contact details of repair points along your route, as this can save stress and time.
On the Traveler Tips website you will find much more information about planning cycling holidays, practical routes and handy travel tips for independent travellers. Discover more and prepare your next trip even better.
Frequently asked questions
Essential basic tools: tyre levers, a sturdy mini pump, a good multi-tool (with Allen keys, screwdrivers and preferably a chain tool), some cable ties and a small roll of tape. As for spare parts, take at least one or two spare inner tubes, a set of patches, a chain link or quick link and spare brake pads (certainly in hills or wet weather). You can also add a few disposable gloves and a small bottle of chain oil. With this you can fix most types of bike breakdowns yourself on the road.
Before you leave, check the tyre pressure and the condition of the tyres (cracks, stones, glass) and take a spare inner tube and pump. Before you set off, test the brakes (front and rear), see whether the brake pads are still thick enough and whether nothing is rubbing. Look at and listen to the chain and gears: chain clean and lightly lubricated, shifting without skipping, no strange noises. Finally, go over all bolts, racks and bags for play and take a short test ride with luggage to feel whether everything is stable and free of vibrations.
In many countries you can use Google Maps, Apple Maps or OpenStreetMap to search for terms such as “bike repair”, “bicycle shop” or the local word for bike shop. Also check the website or app for your route (e.g. EuroVelo, LF routes) or for cycling holiday organisations; they often have lists of repair points along popular routes. In tourist regions, the local tourist information office, campsite or hotel reception usually knows which bike shop is reliable and open. If you are travelling with a roadside assistance subscription (ANWB, insurer), you can be referred to certified repair points via their app or emergency number.
You can learn to repair a flat tyre yourself or replace the inner tube, so you do not have to wait for help. You can also easily master putting a derailed chain back on and doing some light adjustment. In addition, checking and lightly adjusting the brakes and tightening loose bolts (such as on the luggage rack or mudguards) are also easy to do yourself. If you practise these basic repairs before departure, you will save a lot of travel time on the road.
Bike insurance with roadside assistance can be a good idea if you often make longer rides, have an (expensive) e-bike or cannot or do not want to tinker yourself in case of breakdown. In the terms and conditions, look at the cover: the Netherlands only or also abroad, 24/7 assistance, maximum distance from home and the number of call-outs per year. Check whether call-out charges, replacement transport and (return) transport for you and the bike are included. Finally, look at exclusions (e.g. insufficient maintenance, a forgotten battery, vandalism) and the excess.